

Starting Position:
Vajrasana
Concentration:
on the whole body
Breath:
normal breathing
Repetitions:
2-4 times
This exercise sequence is dedicated to Bhagwan Sri Deep Narayan Mahaprabhuji. Khatu is the place (on the edge of the Thar Desert in the west of Rajasthan, India), where this greatly revered Saint lived for 135 years.
This exercise, which harmonises body, mind and soul, is the outcome of research and experience extending over many years. In the initial stage of practice, focus is given to the physical benefits.
Khatu Pranam strengthens, stretches and relaxes the muscles of the whole body, promotes flexibility of the spine and regulates glandular activity. It fortifies the immune system, which in turn increases resistance to disease. The entire nervous system is balanced and strengthened. A few rounds performed daily are helpful in correcting poor posture, relieving back pain and digestive problems and reducing stress.
The more advanced levels of Khatu Pranam are practiced in coordination with the breath and with concentration on the energy centres of the body (Chakras) as described in Level 7.
The whole Khatu Pranam sequence is invigorating and brings balance to body, mind and psyche. Therefore it is beneficial to include this sequence in your daily exercise programme from the first level.
Practice:
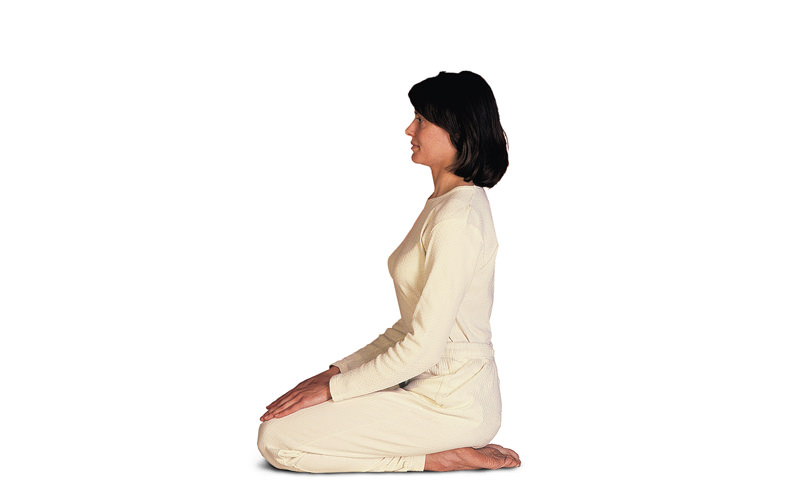
Sit in Vajrasana. The upper body and head are straight and in line. The hands rest on the thighs.
-
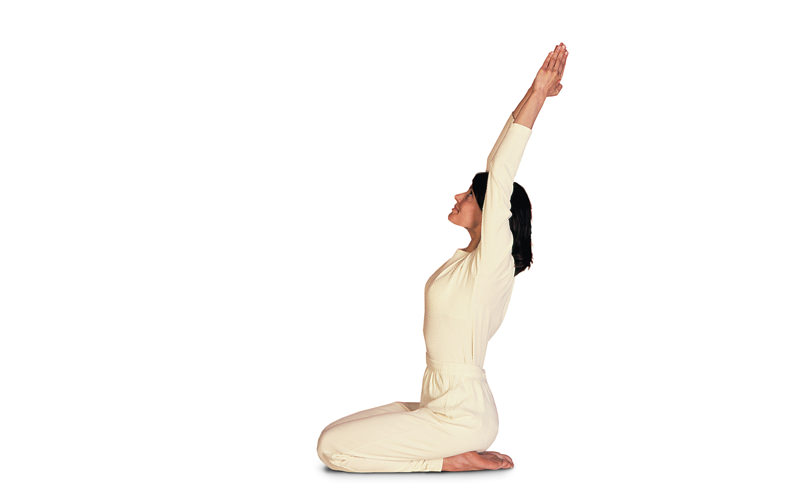
Raise both arms above the head. Place the palms together and look towards the hands.
-
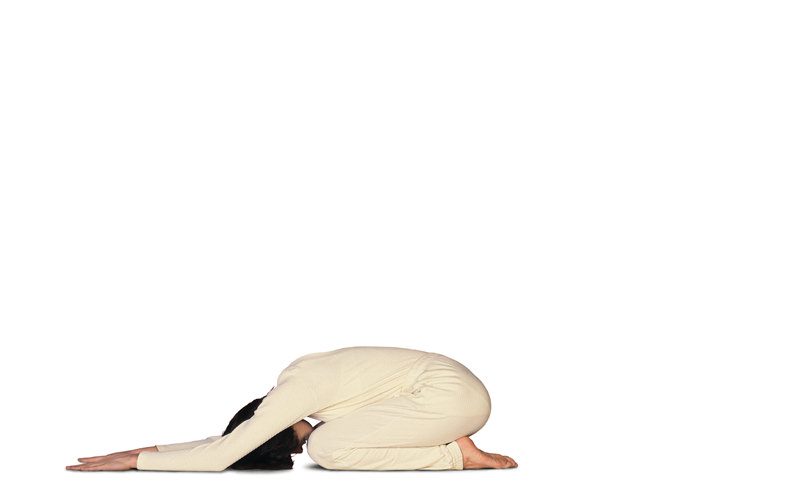
Keeping the back straight turn the palms to the front and bend forward from the hips, until the arms and forehead touch the floor.
-
Bring the body forward until the shoulders are between the hands. The toes are tucked under and hips are raised from the floor.
-
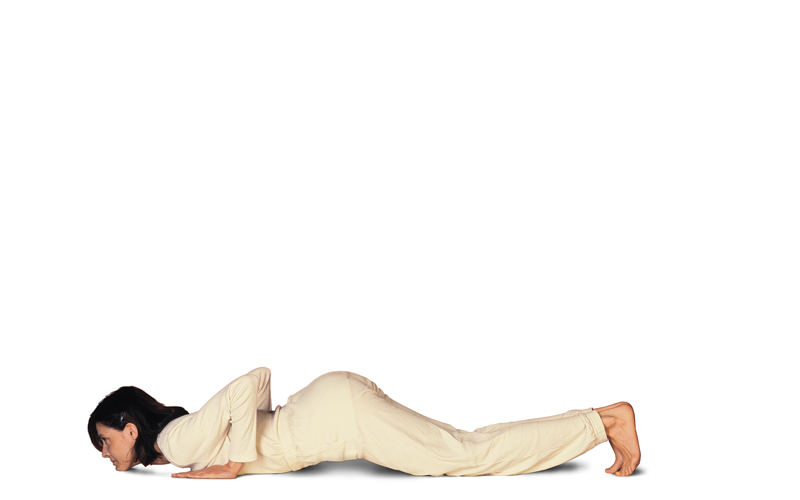
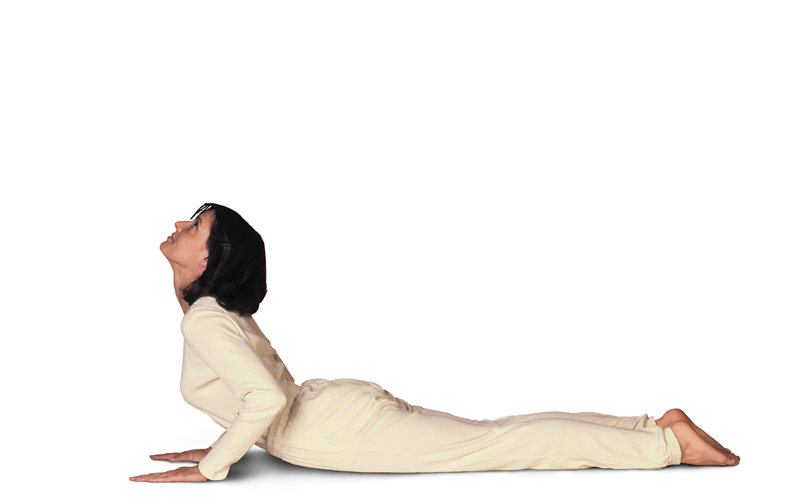
Lower the hips to the floor and raise the upper body with the help of the hands, but only to the degree that the hips remain in contact with the floor. Look upward, ensure the spine is evenly arched.
-
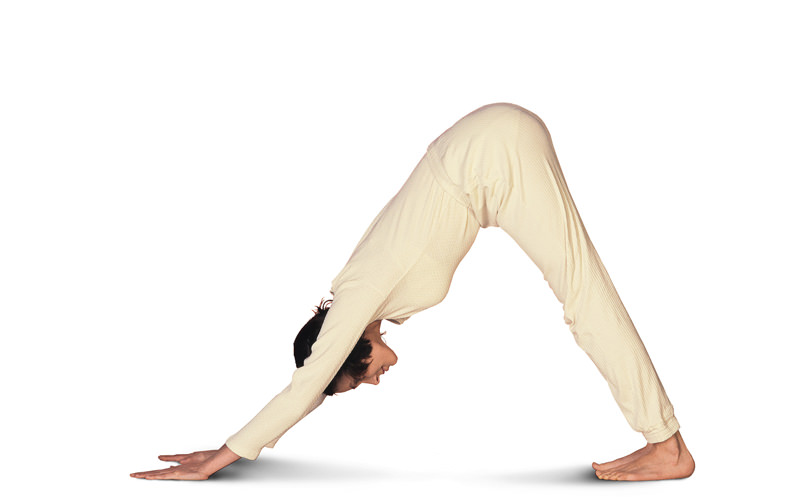
Keeping the legs straight, raise the buttocks. The upper body and arms form a line. The soles of the feet should be flat on the floor. The head hangs relaxed between the straight arms.
-
Bring the right foot forward between the hands and place the left knee on the floor. The palms or fingers touch the floor. Raise the head and look to the front.
-
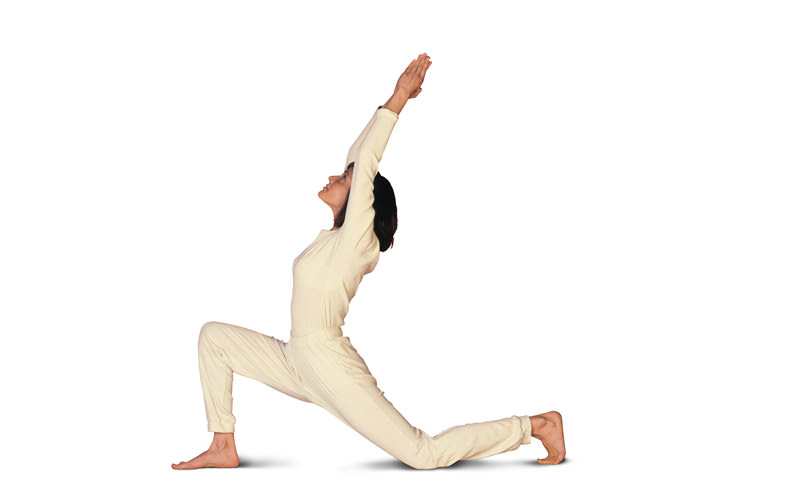
Raise the arms above the head and bring the palms together. Look towards the hands. Press the hips forward slightly and lift the body up.
-
Return to Position 6.
-
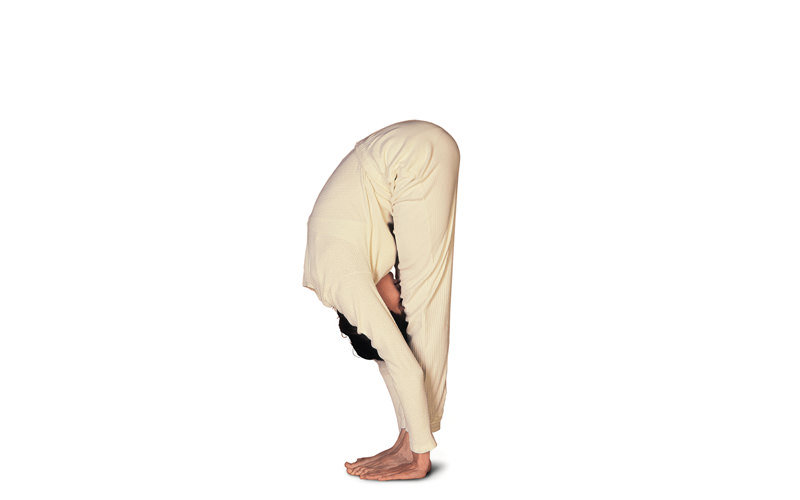
Place the left foot beside the right and straighten the knees. Allow the upper body to hang relaxed.
-
Keeping the upper body and arms in a straight line, lift up from the hips. Bring the palms together and look towards the hands. Be sure not to over-extend the lower back.
-
The Asanas continue in reverse order.
-
Bend forward again and allow the upper body to hang, as in Position 9.
-
Bring the right foot back and place the right knee on the floor, as in Position 8.
-
Raise the arms, as in Position 7.
-
Lower the arms and place the hands beside the foot on the floor, as in Positions 6 or 12.
-
Bring the left foot back beside the right foot and raise the buttocks high, as in Position 5.
-
Lower the hips and raise the upper body with the help of the hands, as in Position 4.
-
Bring the chin and chest to the floor raising the hips slightly, as in Position 3.
-
Bring the upper body back and come into Position 2.
-
Raise the upper body and arms at the same time, as in Position 1.
-
Lower the arms and return to the starting position.
-
In the second round, step the left foot forward between the hands in Position 6 and step the left foot back again in Position 12. In the third round step the right foot 1 forward again, etc.
Benefits:
A detailed description of the benefits and effects of each position is found in Level 7.
Caution:
This sequence should not be practiced with very high blood pressure or if there is a tendency to become dizzy.